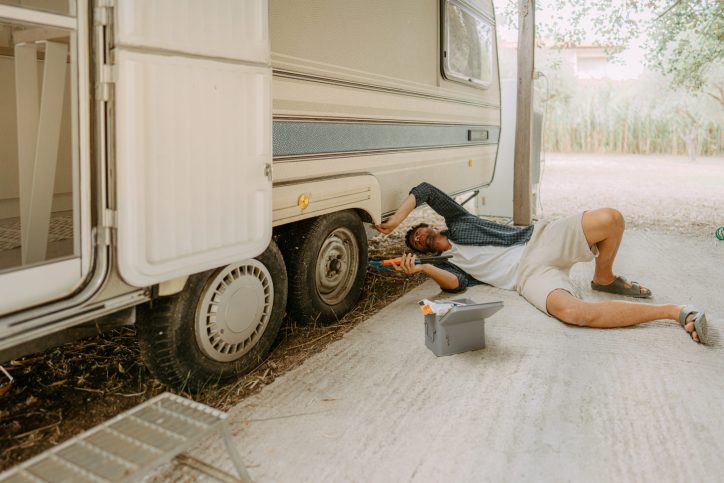
Good maintenance is preventative maintenance. Opening your RV on a nice spring day provides a great opportunity to begin the prep for the coming season. Like most annual rituals – it’s best to follow a step-by-step checklist to avoid missing important details.
Before you start cleaning or doing tests, now is the time to look for and find any rodent damage, water seepage or structural damage. Water, mice, decaying coverings, or failing members all leave tell-tale signs on walls, ceilings, and floors.
If you find evidence of any of these, trace them to the source before you clean up. It might be a little thing or a big thing – it’s always better to know early.
Next, test all the trailer/motorhome systems. Check the air conditioning, furnace, water pump and the stove. Plug into shore power and run the microwave, TV, radio etc. Recreational vehicles, whether trailers or motorhomes have many systems, so using a detailed checklist each time you inspect will ensure you don’t overlook anything. Keep these notes, and you’ll have a maintenance log that will come in handy when you’re trying to remember when you last filled the propane, did the brakes, or how long it’s been since you changed the house battery.
House Batteries
Winter is hard on batteries. The battery may be drained come spring – but can you tell the difference between drained and defective?
You can’t. This can only be checked with a “stress” tester. I’ve had the experience of charging a dead battery, thinking it was fine, and heading down the road only to have it die again within hours. Have it checked, or do it yourself.
Trailer Brakes
Ask yourself right now – when were your brakes serviced last? How often should they be serviced? Brakes are out-of-sight/out-of-mind components owners tend only to remember once they get vocal. OK, so it’s spring – now is the time. This is your reminder.
Here are the basics everyone should know – and just a bit more.
Most trailer brakes are of the older style “drum” variety. The key difference between these and those found on most cars/trucks is that the actuator (the arm that presses the brake pads against the inside of the drum) is electrically activated rather than hydraulically. This electric pulse comes from the trailer brake controller in the tow vehicle. This system does the obvious – syncs up the trailer and truck brakes; because you want those to work together. But it does so much more. In-cab readouts will show owners how much braking force is being applied to the trailer so they can change it to account for a loaded or empty condition – even weather can play into how much brake force the trailer should exert. Trailer brake pads often don’t need a replacement for many years (depending on usage). Still, because of the time most trailers sit idle over the winter, corrosion, binding, seizing, and wire deterioration are the true enemies of your brakes. At the very least, trailer brakes should be inspected visually, cleaned, and lubricated.
The Hitch
Now is the time to inspect it; otherwise, it could be rusted into place when you need it. Clean and lubricate all parts of the hitch. Check for corrosion damage at all welds and bolt heads with a hitch attached to the frame.
Electrical Hookups
Winter is the hardest on electrical lines and connections. Clean the light cord sockets and lubricate them with light lithium grease. Pay special attention to ground wires – they are always the first to rust right off the frame. Hook up your tow vehicle – plug in, test, and check all lights and functions around the trailer – now is the time to find out if you have any dead marker or signal bulbs.
Inside Wiring
Rodents nesting in RVs is a fact of life – we try to deter them, but they still often get in. Apart from the mess they make, there is another thing you should look for in your spring cleanup – chewed wires. Just last year, I had an experience with mice chewing up a set of booster cables under my seat in my 1971 Cheyenne that had overwintered in my barn. That incident led me to investigate why mice want to chomp on plastic coatings. It turns out that many electrical wiring coatings today are made with soybean-based plastic; they still smell the soybean and get busy chewing on it. Inspect all the wiring you can get to – a clue is finding the coloured plastic bits lying around.
Tire Condition
Before hitting the road, inspect the tire tread and, just as importantly, the sidewall condition. Look for cracks and bulges that might indicate ply separation. Tires don’t last forever – even if they get little use – they dry out. Now consider that once you load up the added weight and summer heat stress, this may be the straw that breaks your tires back. Anticipate this problem and replace the rubber accordingly.
Next, air up the tires. Consider that a substantially under-inflated tire does not roll as smoothly as it was designed to. The increased rolling resistance causes the tow vehicle to burn more fuel, increasing emissions and fuel costs.
According to a Rubber Association of Canada survey, nearly seven in 10 personal vehicles will have at least one over or under-inflated tire on any given day on Canada’s roadways. It follows that this ratio would apply to trailers as well.
Roof, Seams, and Caulking
After a visual inspection – you can see wear and damage with your eyes – of course, if you see evidence of water inside the trailer, you know you are looking for a leak. Check along all seams and look for tears in the rubber. After the roof, check all the wall seams. Remember that caulking dries out and pulls away from the surface it’s meant to protect. If it looks suspect, tear it out and re-caulk. This is much cheaper than having to tear out the inside walls later.
This list of reminders will get your camping season started right – of course, there is always more we can do to prepare, but the fact that you are being proactive greatly reduces the chances of on-road problems. Not to mention you just learned so much more about your unit. Have a great season!


