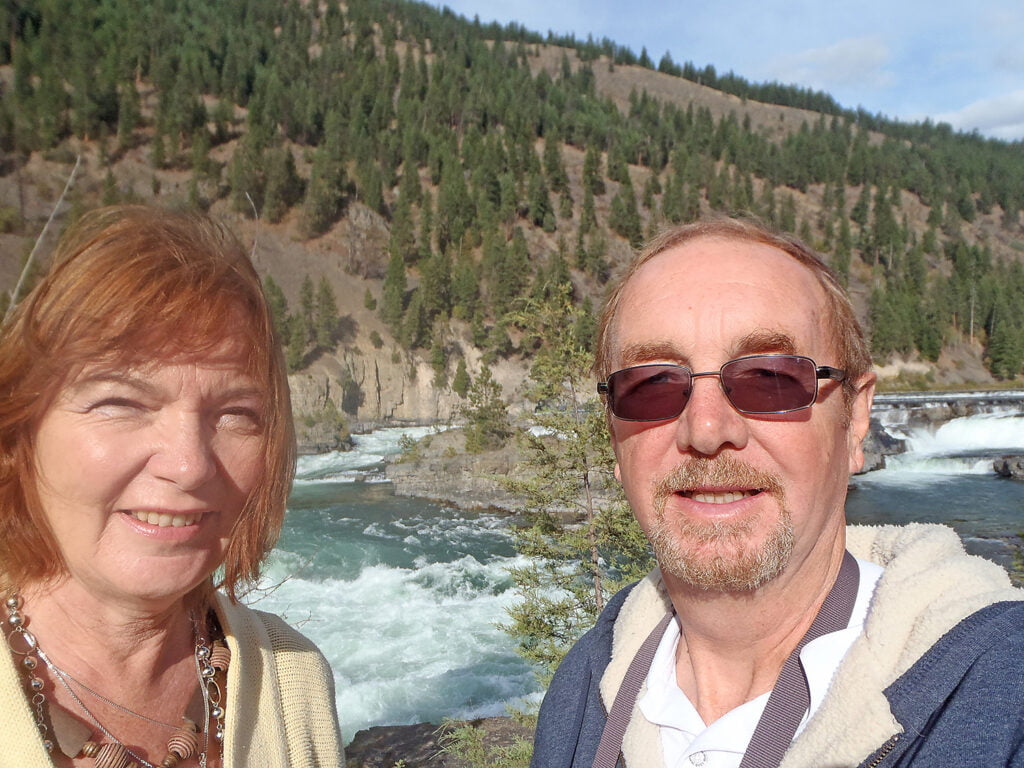
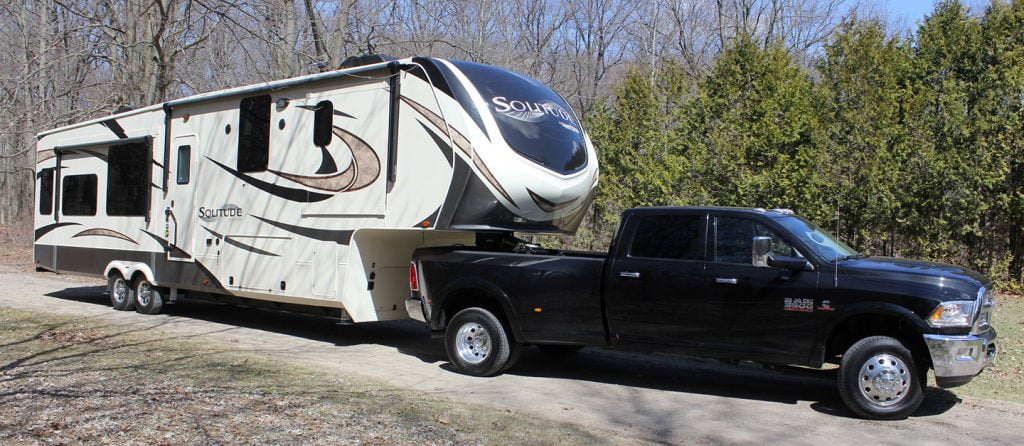
It was a Monday lunchtime in September, nobody was around, kids were back in schools. Linda and I had just backed our fifth wheel trailer onto the Forestry Commission-approved dry camping site. We were at Kootenai Falls, Montana. Kootenai Falls is located between the towns of Libby, and Troy, northwest Montana.
It happened as we were levelling our fifth wheel trailer. One landing leg stopped driving out.
After calls for assistance failed to get any immediate on-site help, it was time for a DIY repair.
Trout Creek, Motel & RV Park
Trout Creek campsite.
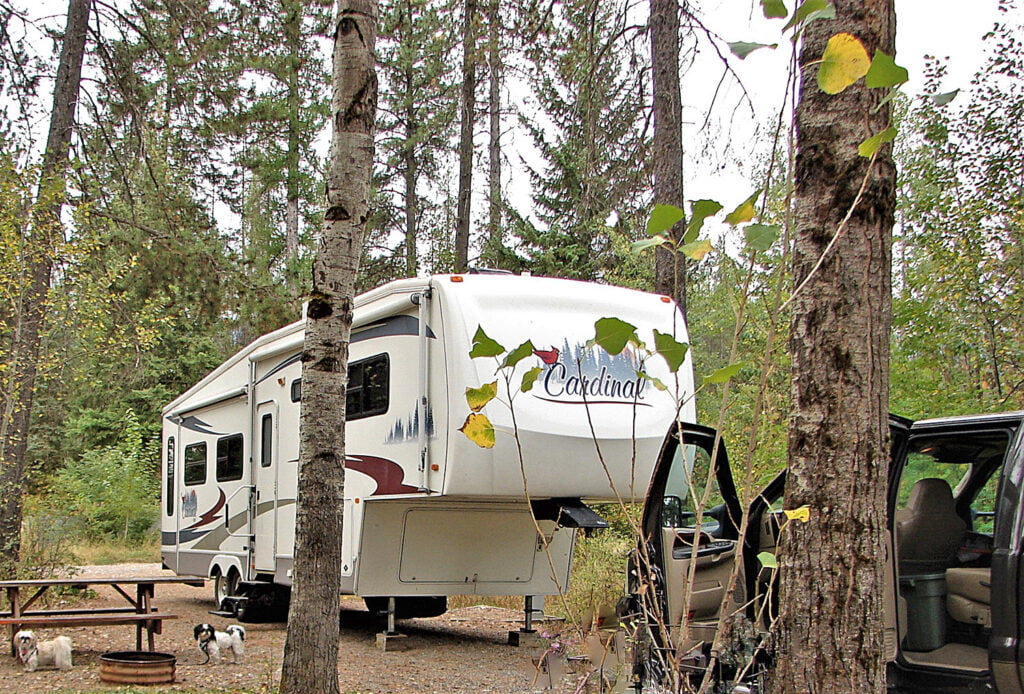
Three days earlier, we had arrived at Trout Creek Motel & RV Park, Trout Creek, Montana, and booked in for three nights.
This is a peaceful and well-maintained campground with a few full-service sites available; each site well-separated from the next by natural forest.
“You’re lucky we have one site available.” Bert at the desk told us. “Getting a site here without an advanced telephone booking on the weekend is unusual.”
The full-service sites are all gravel and reasonable for parking; even with our 12-metre rig, we had no problem. There are also grass tent sites available.
Sunday Morning
As usual, we went to a local church service on Sunday morning. We were invited to join the congregation in their hall for the monthly lunch. Meeting people is one of the things that makes RVing interesting.
Our lunch companions were Jim and Bev Orland. Jim, who is ex-military, has called Trout Creek home all is life. Bev, also ex-military, moved back there with Jim fifteen years earlier.
During the lunch conversation, they suggested that we would enjoy a visit to a local natural treasure – a place most tourists from outside the area don’t get to see. Jim told us how to get onto the forest back roads and find the approved dry campsite at Kootenai Falls.
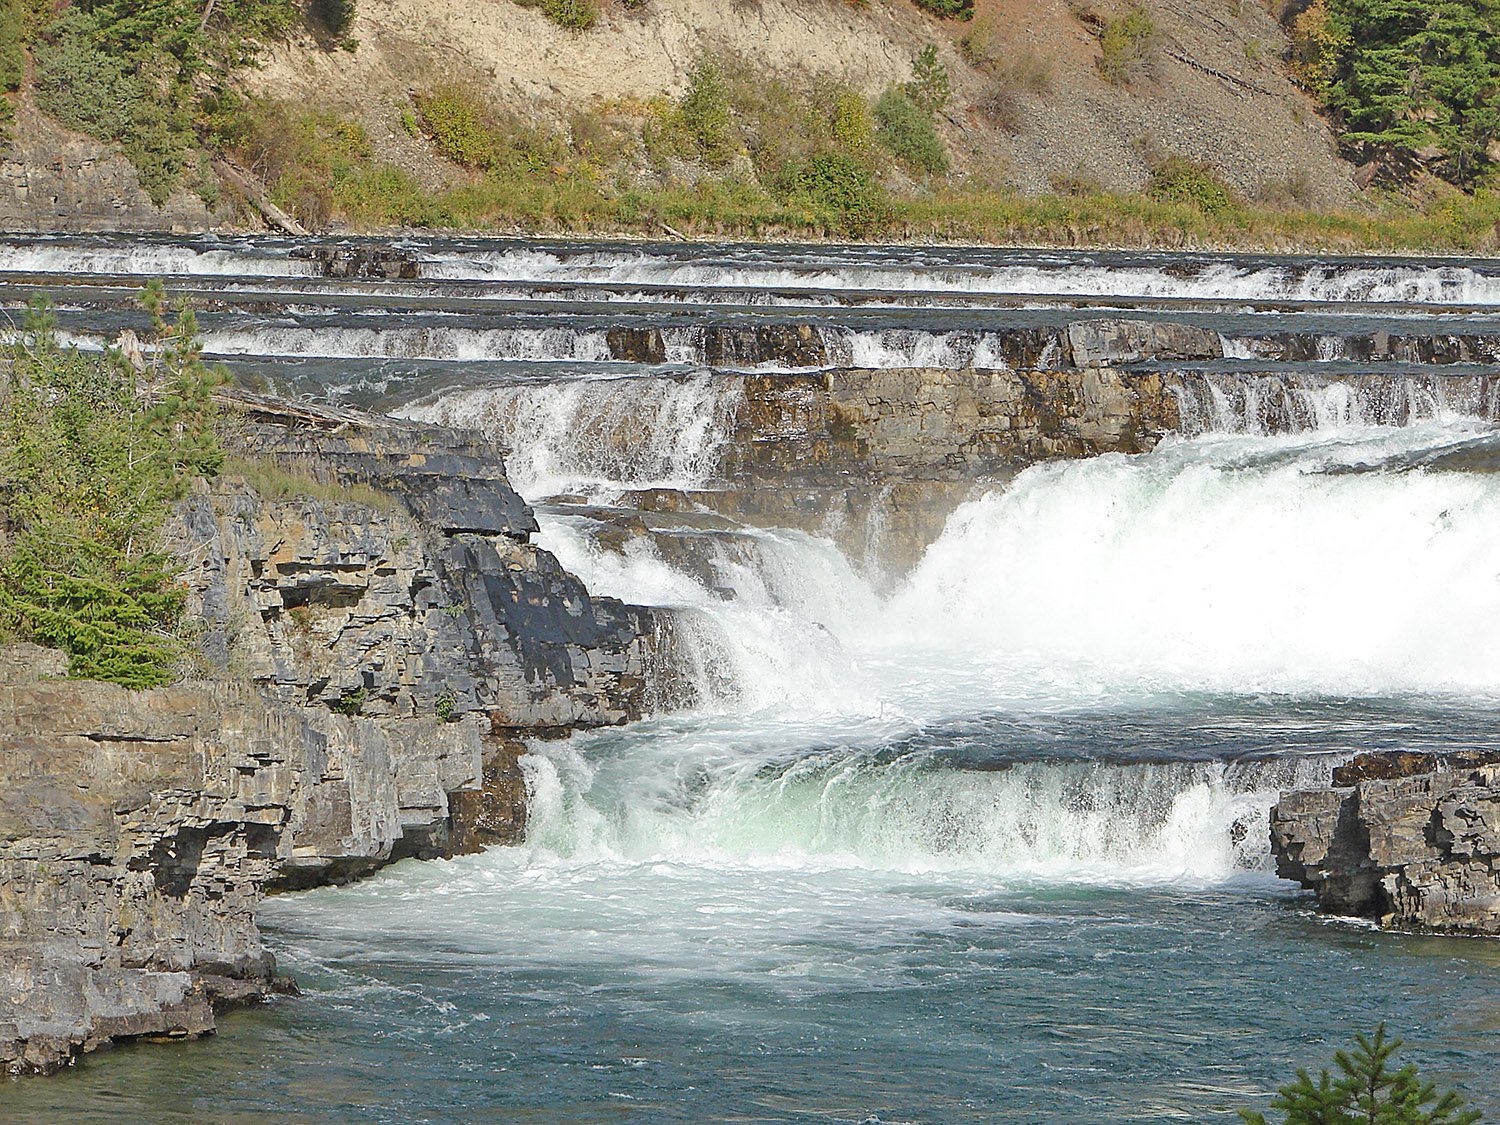
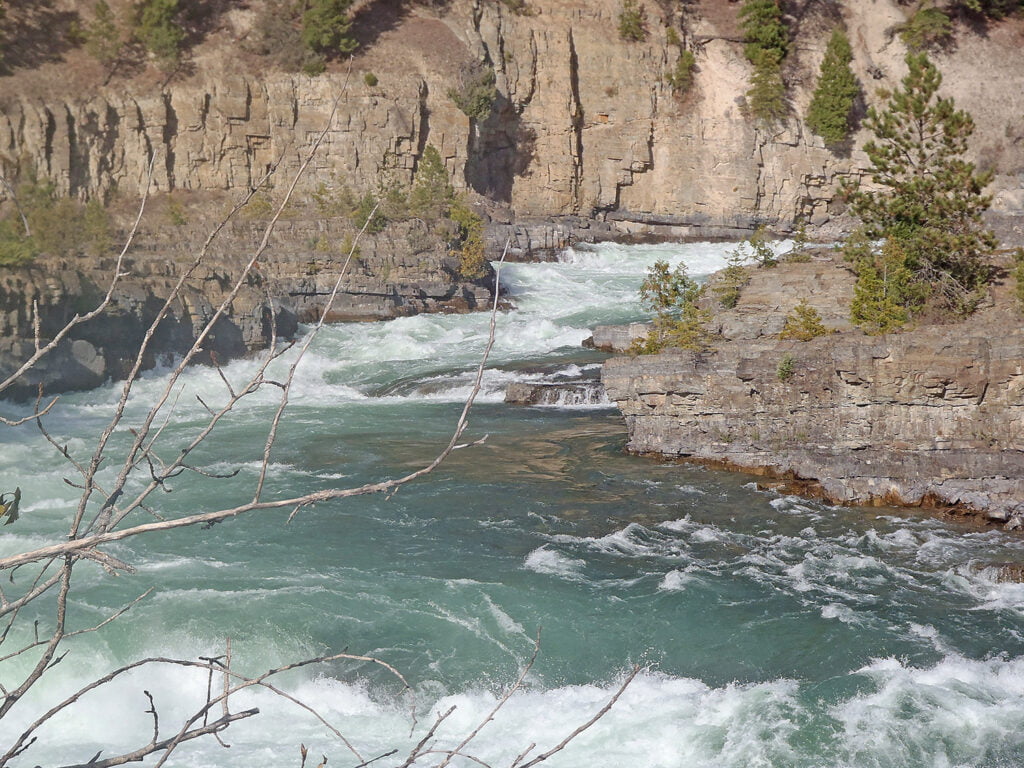
Kootenai Falls is about one hour’s drive from Trout Creek, on the continental divide. The rivers run west and the falls cover approximately one mile of the river. The elevation drops a spectacular 100 ft, with thundering water winding through the gorge below a suspension bridge and cascading down waterfalls.
Thundering water winds through the gorge.
The casual conversation became the unplanned destination for Monday; a one-hour drive and a dry camping site in the forest close to the falls.
Dry Camping on Forestry Land at Kootenai Falls, Montana.
With no signpost, you would not find these campsites without directions. It was a dirt back-in, off a forest dirt road, no signposts, and no facilities. Once on the campsite, you can shut off the engine, open the windows, and let your senses take it in. The smell is was not roses but the clean, fresh aroma of a healthy pine forest. At first, it is very quiet. Your big diesel engine stopped all animal sounds. Then slowly, the animals and birds accept your monster truck in their midst, and wildlife restarts its chatter. As your ears adjust, you hear the rustle of the leaves and in the distance the sound of running water cascading over rocks. There it is—the falls.
The Curbside Landing Leg
After backing in, we started the task of unhooking the trailer from the truck. This is a simple operation which is performed regularly.
The curbside landing leg was lifting off the ground—a sure sign of trouble.
My cell phone calls went to voice mail. There was no doubt this was going to be a DIY repair.
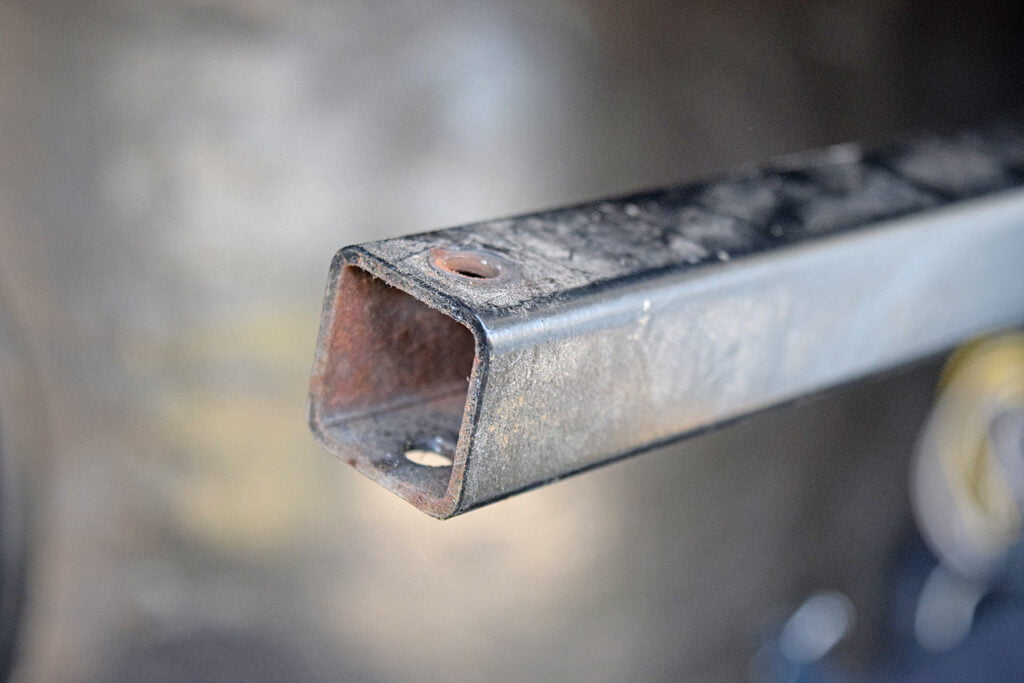
Square driveshaft connects to the landing leg beveled greer shaft that broke.
Diagnosing the problem is the first step, and experience plays a part in this. We had experienced a broken shaft in the landing leg gear drive before. At that time, the rig had been parked at our dealership, Campkins RV Center, Ontario. The dealership had repaired it under warranty, and we had purchased a spare gear mechanism, reasoning that if it can fail once, it is likely to fail a second time.
Selecting the spare parts to carry with you requires a crystal ball, magical powers, and the knowledge of how far your future travels will take you away from dealerships.
WARNING: Do not try lifting the fifth wheel with only one landing leg operating. One leg is not designed to take the weight and may collapse, causing severe damage and injury.
Preparation for the Repair
- The whole landing leg must be removed.
- Removal of the landing leg meant you must first support the trailer weight to prevent it from moving.
- You should reconnect the truck securely, as this will prevent the working leg from collapsing. The trailer cannot collapse with the 5th Wheel connected.
- You should use wooden blocks under both sides of the trailer.
- You must check the wheel chocks and wheel cross jacks. All must be in place and tight to prevent the trailer from moving.
How the Landing Leg Mechanism Operates
An electric motor drives a small gearbox in the front storage compartment. The motor force transmits movement through square connecting rod that goes to a set of beveled gears located at the top of each landing leg. The motor rotation turns into a vertical lift through beveled gears and a pair of screw jacks, with one in each landing leg.
Manufacturer’s Drawing
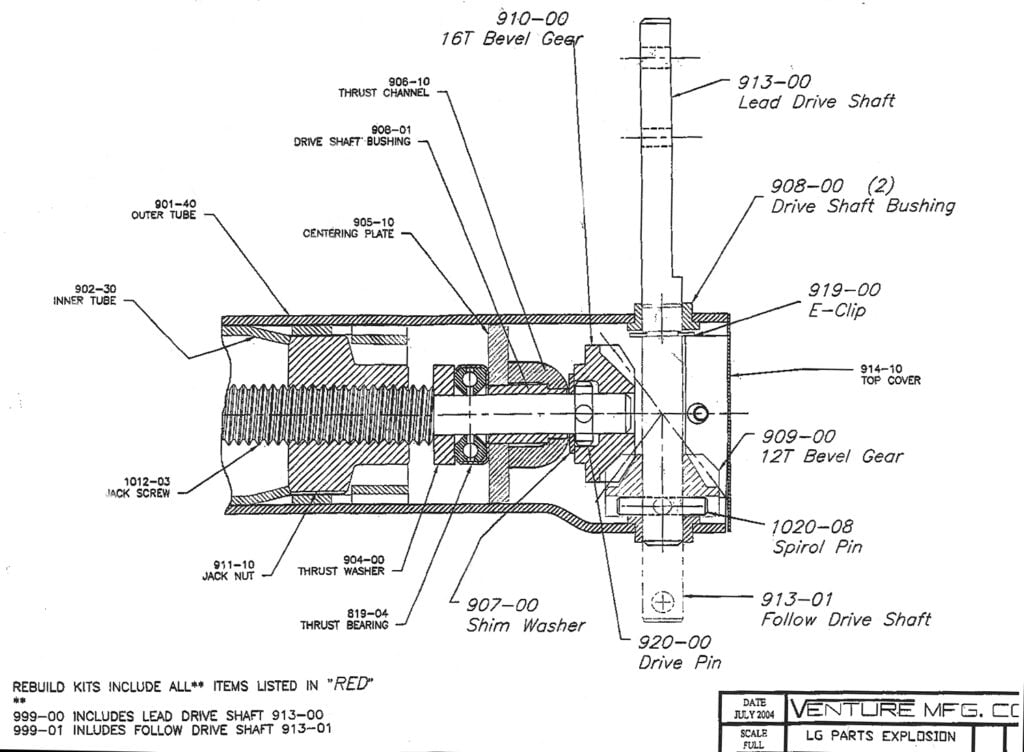
The Lead Driveshaft is secured to the Connection Rod by a 0.25inch bolt through this hole. It was the stress of rotating that cause this “Lead Driveshaft” to break at this point.
Manual Operation
The landing legs on most fifth wheel RVs have a manual hand crank for use when the motor or electrical system has failed, and the mechanical side is intact. This was a mechanical failure.
Landing leg manual crank.
Removal of Curbside Landing Leg Assembly
- Disconnect the lead driveshaft from the square connecting rod by removing the 0.25 inch bolt, typically a Hex head requiring an Allen wrench or Hex Key to loosen the screw. Note: It would be best to use a new bolt and nut with a self-locking insert for replacement.
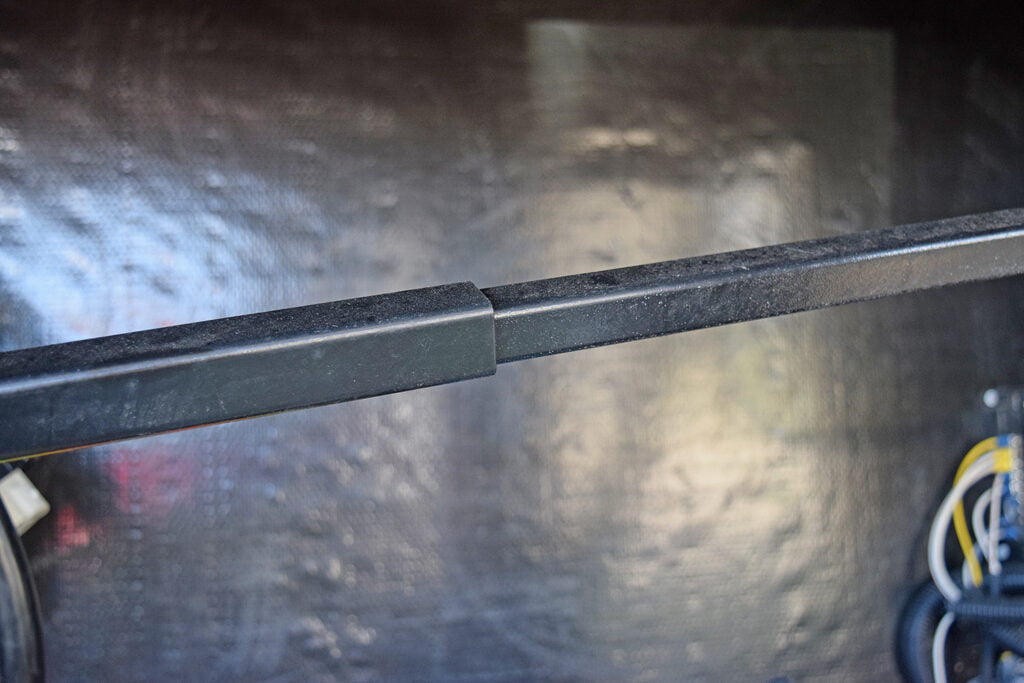
Vertical landing leg upper casing, showing top cap, horizontal square connecting rod, and Hex bolt.
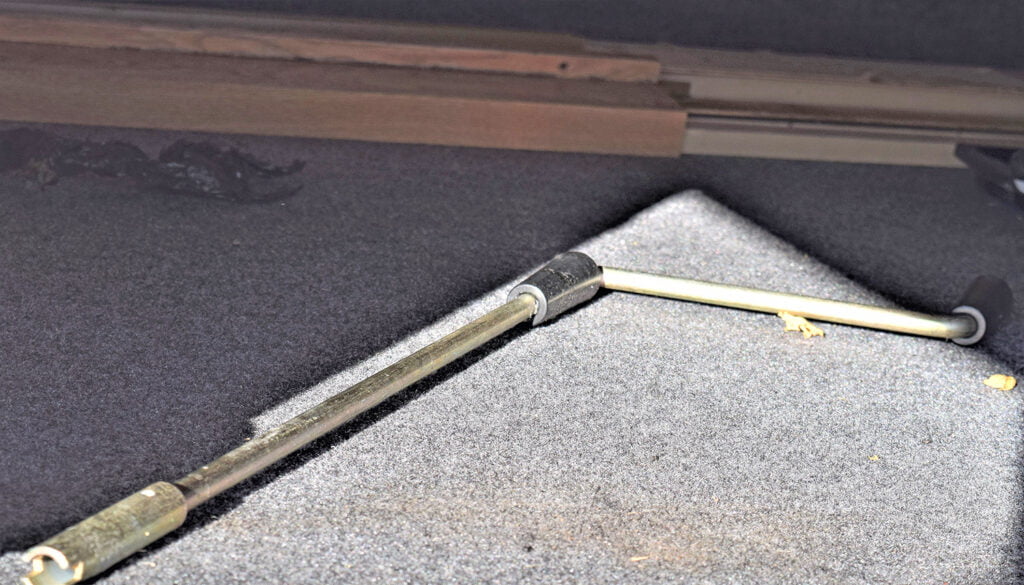
- Slide the square connecting rod clear of landing leg assembly and support it. Note: The square connecting rod is in two parts that telescope together for ease of installation/removal.
The square connecting rod is in two parts that telescope together.
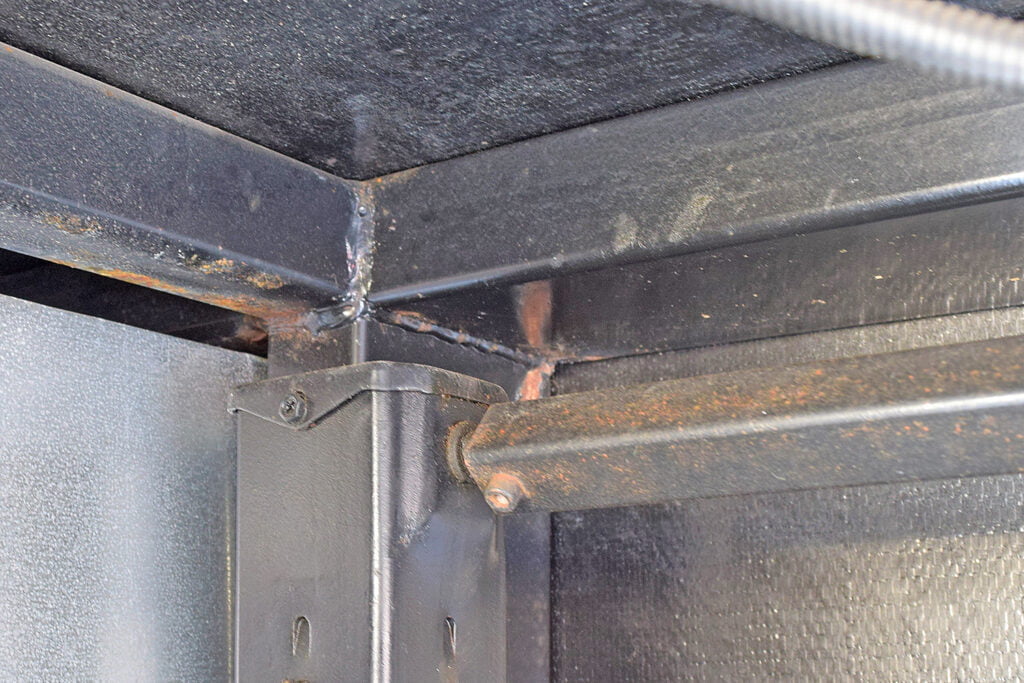
- Remove the bolts from the upper and lower landing leg u-clamps. Note: the positioning stops on the outside of the leg casing. These prevent the upper landing leg casing from moving.
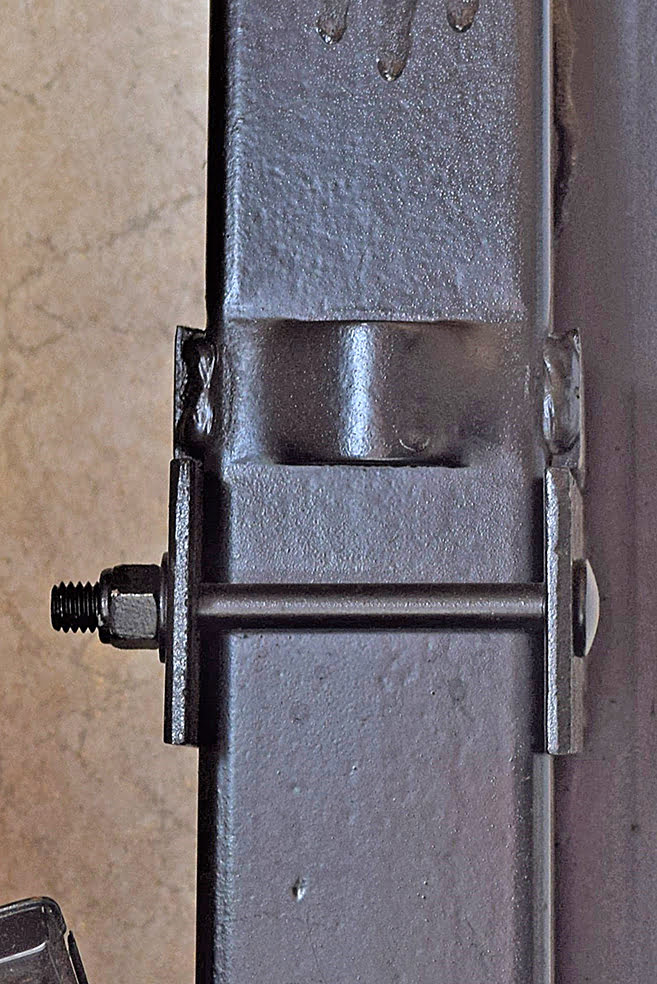
Upper landing leg, u-clamp, and bolt. The leg positioning stops can be seen above u-clamp.
- Remove the leg from the two holding brackets and slide it down and out of the trailer storage compartment.
Removal of Broken Driveshaft from the Landing Leg
- Remove the two screws securing the top cover.
- To remove E-Clip 919-00, you should use a removal tool.
- Several different manufacturers make similar products, all marketed under their own names.
- Directions will help remove E-clips without the proper tool; Using a small, flathead screwdriver, you can insert the screwdriver in the visible gaps between the E-Clip and the shaft and twist, push up, and out. Warning: work with the screwdriver blade inside a rag wrapped around the driveshaft so that you are sure to catch the E-clip when it springs free. Carefully remove the E-clip, clean off grease and place safely to one side for reuse.
- The Spirol Pin 1020-08 secures the beveled gear to the Lead Driveshaft 913-00. “Spirol Pin” is the trade name for a coiled spring pin. The type used on the bevel gear in the landing leg is known as a through-hole design. Work inside a rag to catch the Spirol Pin when it falls free. A through-hole design coiled spring pin can be removed easily and quickly by tapping through with a punch of the same diameter. Push the pin carefully with a hammer and punch until the coiled pin exits the other side. You will reinstall the coiled pin back into the assembly after the repair. A substitute punch can be used with care, such as a nail, wire, or plyers, to push or pull the pin.
- With the beveled gear free, remove the damaged lead driveshaft by sliding it out of the bushings.
- Clean the beveled gears, driveshaft, and both bushings.
Rebuilding the Landing Leg
- Insert new driveshaft into the bushings at the top of the landing leg taking care to have the driveshaft slide through the beveled gear.
- Reinstall Spirol Pin in the beveled gear.
- With a screwdriver, push E-Clip back in place.
- Apply Wheel bearing grease by hand through the top cover, ensuring that the Jack screw and bushing are well lubricated.
- Testing. With the top cover plate still removed, perform a visual inspection of the landing leg operation. Turn the lead driveshaft which in turn will turn the Jack screw using a battery-operated drill. The use of an electric drill griping the driveshaft makes this task easier. WARNING: The rotating beveled gears could cause injury to fingers.
- Replace the top cover and the two securing screws.
Reassembly of Repaired Landing Leg onto the Trailer
- Slide landing leg into the alignment brackets.
- Ensure the leg casing marks line up with the mechanical stops on the trailer frame and replace the holding bolts securely.
- Align the lower leg. The exact number of locking holes as the roadside leg should be showing.
- Slide the square connecting rod back in place.
- Replace the 0.25 inch nut and Hex bolt through the square connecting rod and landing leg lead driveshaft. Tighten.
Recommended Preventative Maintenance
- Annually, you should remove the top cap off each leg and hand push bearing grease into the top of the leg. Alternatively, some landing legs are fitted or retrofitted with a grease nipple in the side of the upper casing.
- Drive the legs to the top and bottom limits several times to ensure the grease reaches all parts of the jack screw.
- Replace the top cap and screws.
A Job Well Done
With the satisfaction of a job well done, you can take yourselves for an afternoon walk to Kootenai Falls, along with the foot traffic suspension bridge and the trails surrounding them. Kootenai Falls has a fascinating history dating back thousands of years. The Kootenai or Tunaxa people lived in the area in nomadic bands. These bands then continued on to cross what is now known as the Canada/US border.
An afternoon walk to the Kootenai Falls.
It wasn’t until the early 1800s that European fur traders first saw this area as “A Wild Land of Adventure.” The rest, as they say, is history and can be read on the many trail signposts.

Foot traffic suspension bridge, Kootenai Falls.
I would recommend camping at Trout Creek and taking a day to drive to the falls for the afternoon and back to Trout Creek RV Park in the evening.
Campground Information:
Trout Creek Motel & RV Park
2972 Mt Highway 200
Trout Creek, MT 59874
Phone: (406) 827-3268
Related Articles
Backing Up Is Hard To Do
The Pandemic has changed our lives this year; that’s a fact. Most would say for the worse, however I’ve found that with the restrictions and resulting slower pace of life, I have more time to invest in the details that I previously skipped over. This...
7 Storage Space Solutions for Your RV
Anyone who owns an RV can attest to the fact that an RV doesn’t exactly have the largest amount of storage space inside, and when you have to bring all your necessities and treat it as a second home while on your camping or hiking trips, your storage space inside can...
What Every RVer Should Know About Solar Power and Batteries
Powering your RV with solar energy is a smart thing to do. Drawing power from the Sun is clean, efficient and quiet. So why doesn’t everyone do it? Well, the fact is that most new RVs now have integrated roof mounted solar panels that feed the house batteries. Most...

