
It was the middle of February; we were enjoying a month of luxury camping at Retama Village, in the Rio Grande Valley, Texas. At the end of March, we would head back to Canada. After fourteen years of faithful service, our RV water heater sprung a leak.
“What!” exclaimed Linda, unconsciously running her hands through her hair. “You mean, no hot water until you get this fixed.”
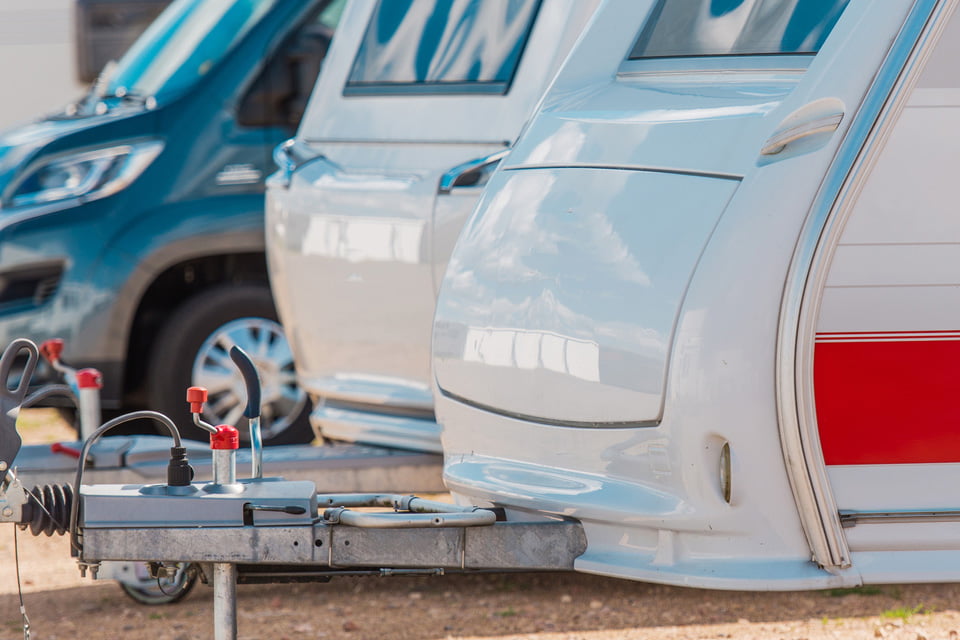
This isn’t just a DIY article on how to replace an RV water heater, this is a lesson on working together. With the skills learnt in this article you demonstrate to each other that you are worth keeping, at least for camping trips.
When the water heater failed, the local RV service shops gave me two options:
1. Wait weeks for them to look at the problem.
2. Take matters into my own hands and install a new heater myself.
Being the hands-on adventurer that I am, I chose the latter. Together with Amazon, a toolbox, and my ever-patient wife by my side, we set off on a DIY escapade that would make MacGyver, from the action-packed television show “MacGyver”, proud.
So, grab your wrenches, and let’s dive into the nitty-gritty of water heater wizardry!
1. How Does a Water Heater Work?
An RV water heater provides hot water for your RV’s kitchen and bathroom. Heat is provided to the hot water holding tank by a propane combustion chamber or an electrical element in the tank. A thermostat maintains the temperature of the holding tank.
2. Identifying the Leak
• Symptoms: Water was seeping from the underbelly of our trailer while parked on a concrete pad, we were connected to the campground’s water supply. In a dry camping scenario, this would have caused the water pump to run constantly to maintain pressure, until we ran out of water.
• Visual Inspection: The first sign of trouble was a damp spot on the concrete beneath the trailer. A bulging underbelly cover indicated the low point where the water was collecting. Upon closer examination, I discovered the problem was ten feet away. A pinhole leak in the welded seam of the hot water holding tank.
3. Acquiring a New Water Heater
• Research: Online research confirmed that replacing the entire unit was the most practical solution, especially since leaks are common in a decade-old steel tank.
• Replacement: Using the details from the existing heater, I ordered a replacement from Amazon with expedited delivery.
• Sealed Box Delivery: While we were away from the RV enjoying a game of Pickleball, the new water heater was delivered to our campsite 24 hours after placing the order.
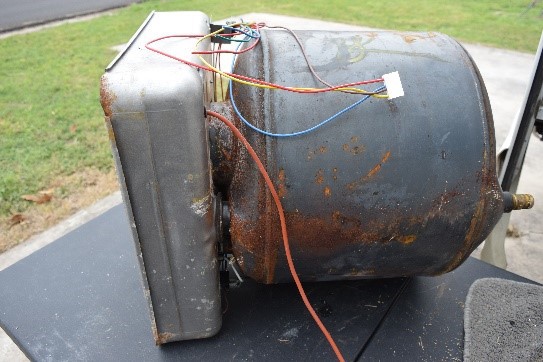
• Lifting the Box: Maneuvering a 49-lb., two-foot square box is no small feat. We extracted the heater from its packaging, making it easier to lift. There was only one minor mishap; the heater slipped, pinning my finger between the heater and the concrete. However, the new water heater remained unscathed.
• Spare Parts: Some additional fittings are necessary for installation. I opted to use the fittings from the old heater, which saved time and a trip to the hardware store.
4. Removing the Water Heater
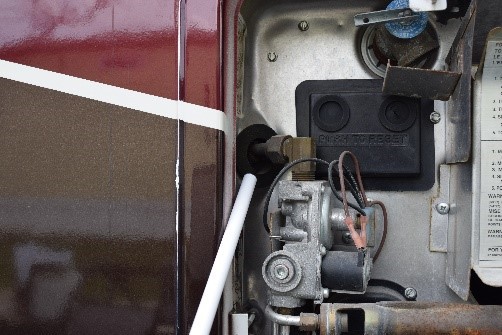
• Tools Required: Set up a table beside the trailer to support the water heater, making the final lift easier. Set your tools on the table: Electrical Multi-meter, Set of small wrenches, Adjustable wrench, Screwdrivers, Plyers, PTFE Tape, and gloves.
• Disconnecting:
• Gas: Shut off the propane valves at the propane bottles
• Burn off any residual gas in the line by lighting the stovetop burner.
• Disconnect the copper gas pipe from the water heater regulator.
• Electrical Connections: Turn off or disconnect the 120VAC electrical breaker at the site Pedestal.
• Test all electrical connections to confirm they are not live before disconnecting the wires.
• Water:
• Close the water valve at the site pedestal.
• Remove the anode or drain plug.
• Open the pressure relief valve to allow the inflow of air to assist in the draining process.
• When water stops flowing detach the water heater inlet and outlet pipes.
• Heater Removal: After draining the tank, carefully take away the faceplate by removing the secured screws from the water heater. With my Linda’s help, we maneuvered the 49 lb. heater out of the trailer, placing it on the adjacent table. Linda temporarily sealed the opening in the trailer wall with a garbage bag and duct tape.
5. Installing the New Water Heater
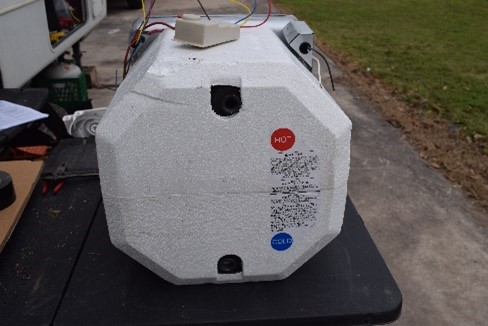
• Preparation: Remove the old PTFE tape from the anode or drain plug and replace it with new tape.
• Pressure Relief: Check that the pressure relief valve is closed.
• Positioning: Proper alignment of the water heater is crucial when securing it to the body of the trailer. Check alignment by placing the faceplate over the heater. The face plate MUST cover any original installation marks on the wall of the trailer. When the heater is aligned install the securing screws and face plate.
• Connections: Carefully reattach the gas lines, electrical wires, and water pipes to the new heater.
• Water: Turn on the water and purge the system of air by running water though all faucets. Check for water leaks.
• Electricity: Turn on the electrical supply.
• Gas Connection: After turning on the gas, perform a bubble test using a mixture of about (15:1) of water and dishwashing liquid to check for leaks. Apply it with a brush or spray to gas pipe joints.
6. Safety Tips
• Lifting: Always lift with care and proper technique to avoid injury. Evenly distribute the weight during lifting to prevent accidents. A 49 lb. weight can hurt, wear leather gloves.
Conclusion: Tackling the replacement of an RV water heater can be daunting, but with standard hand tools, a bit of patience, and a helping hand, it’s achievable. This guide should help you navigate the process smoothly.
You both have the satisfaction of having replaced your RV water heater. You are both worth keeping. Success is rewarded with smiles and a glass of wine.
Happy camping!
Malcolm Callister Experience and Certifications
I obtained engineering training from the Central Electricity Generating Board in England, where I served as a Maintenance and Operations Engineer on oil and nuclear power plants. I hold an HNC certificate in Electrical Engineering. My career in England encompassed roles such as an Oil Refinery Workshop Technologist and Supervisor, an Emergency Service Engineer at Honeywell, and a Maintenance Manager at a steel mill.
My comprehensive maintenance background and experience led to my recruitment by the Canadian Nuclear industry as a Nuclear Safety System Subject Matter Expert. In this role, I assumed a leadership position in troubleshooting and equipment maintenance planning on Nuclear Power plants in Ontario and New Brunswick.
Since 2005, I have been an active RVer, owning two fifth wheels and one travel trailer. I perform all my own RV and home maintenance. This hands-on experience with RVs has further enhanced my understanding of portable generators.
Please note: Malcolm Callister is a professional with an extensive background in Engineering and Maintenance. If you do not feel comfortable performing these tasks, please contact one of your local RV dealers for assistance.
Related Articles
How to Make the Best Dutch Oven Chocolate Cake
Nothing says I love you like the gift of chocolate. This Valentine’s Day, when you gift your sweetheart a box of chocolate, or the Dutch oven chocolate cake that follows, remind yourself that this delicious confection has a very long history as an aphrodisiac,...
Renovating One of Canada’s Original Mini RVs!
Mary Lou and I are avid enthusiasts of the vintage Boler Camper Trailer, perhaps one of the smallest and most compact certified RVs ever manufactured. With interior dimensions of just 10 feet long, 6 feet 1 inch high and 6 feet 6 inches wide, we say,...

Here Are 10 Fun Things to Do While at Home
The spread of COVID-19 throughout Canada and other parts of the world has affected day-to-day life tremendously. In an instant, normal routines have been turned upside down. Now, to do your part to slow the spread, you and your family are being asked to...