Nothing says I love you like the gift of chocolate. This Valentine’s Day, when you gift your sweetheart a box of chocolate, or the Dutch oven chocolate cake that follows, remind yourself that this delicious confection has a very long history as an aphrodisiac, energy enhancer and even fuel for warriors. Chocolate has been around a long time. It isn’t going anywhere so pass the chocolates!
An estimated 4,000 years ago the folks that live in what is now Mexico were processing the fruit found on the Cacao plants into a beverage used in rituals and as medicine. The Mayans called it the drink of the gods and mixed their roasted ground cacao with water, cornmeal, and chilies. At some point, warriors drank it in preparation for battle. 500 years ago, the Aztecs were using cocoa beans as currency, and they drank chocolate as an aphrodisiac. Sometime after that, the Spanish explorers returned cacao to Spain where the locals mixed honey or sugar with the hot liquid to offset the bitterness of the chocolate.
The popularity of chocolate drinks increased slowly until 1828 when the chocolate press mechanized the tedious manual process of making chocolate. This new press separated cocoa butter from the roasted cacao beans leaving the fine cocoa powder behind. This sped up the process of either mixing the powder with liquids, think chocolate milk, hot chocolate and so on, or where it was mixed with fats and solidified into bars of chocolate.
Not to leave RVers out of making chocolate history, here is a one-bowl chocolate cake recipe from my happy childhood adapted for the cast-iron Dutch oven for over-the-fire baking.
One Bowl Dutch Oven Chocolate Cake for RVers

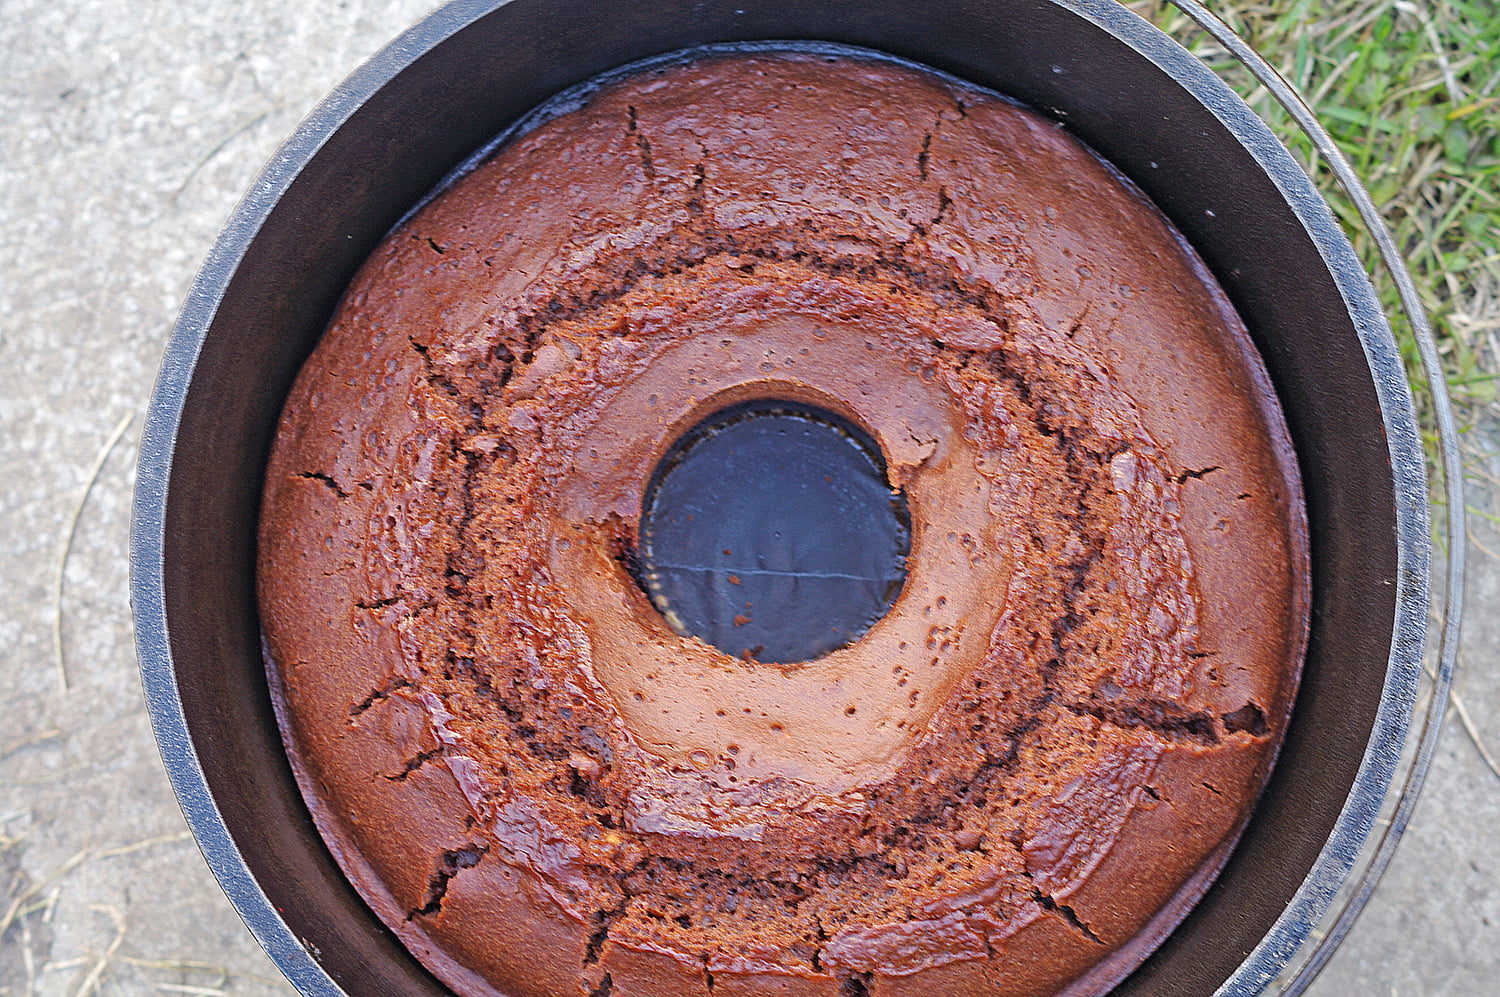
This recipe takes the cake. Photo credit: Timothy Fowler
I have been making this Dutch oven chocolate cake since I was a child. My mother said, “Why would you buy a cake mix when you can make a one bowl chocolate cake.”
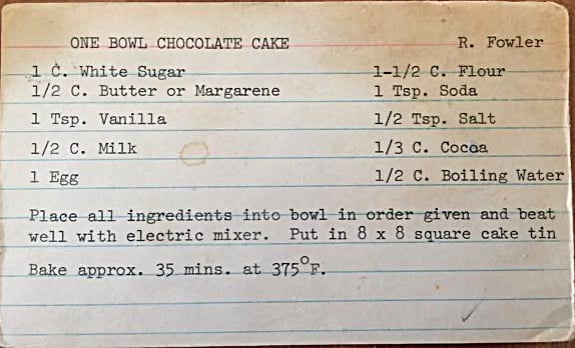
My mother’s one-bowl chocolate cake recipe. Photo credit: Timothy Fowler
This recipe card is from my recipe box, it is typed on my mother’s IBM Selectric. The recipe makes one cake for an 8” x 8” pan. I doubled it for the Dutch oven chocolate cake.
Why Use a Dutch Oven for Chocolate Cake?
Sometimes we do things just because we can—this is one of those times. Light up 26 old-school Kingsford briquets once you have the dry ingredients mixed and the wet ones ready to go. I pre-measure all the dry ingredients into a sealable bag and bring butter, eggs, milk, and vanilla in the cooler. Add all the ingredients in one mixing bowl with softened butter and once you add the hot water, beat hard with a whisk for two minutes. It worked great in the Dutch oven.
Equipment You’ll Need
- 26 Kingsford briquets
- 12” Dutch oven (the one with the legs designed for charcoal cooking)
- Mixing bowl
- Whisk or hand beater
- 10-ounce soup can, or other can that fits under the lid, emptied, washed and label removed
- Stones to fill the can
- Parchment paper for oven bottom
- Dutch oven lid lifter
- Dutch oven lid stand
Ingredients for a Dutch Oven Chocolate Cake (Mom’s Recipe Doubled)
- 1-1/2 cups (375 ml) all-purpose flour
- 1-1/2 cups (375 ml) cake flour
- 2 cups (500 ml) white sugar
- 1 cup (250 ml) butter (soft or partially melted)
- 2 teaspoons (10 ml) baking soda
- 2 teaspoons (10 ml) salt
- 2/3 cup cocoa (160 ml)—I prefer Fry’s Cocoa Powder
- 2 eggs
- 1 cup (250 ml) near-boiling water
- Additional butter or Pam spray to lubricate the inside of the Dutch oven
How to Make a One-Bowl Dutch Oven Chocolate Cake
1. Light 26 Kingsford briquets.
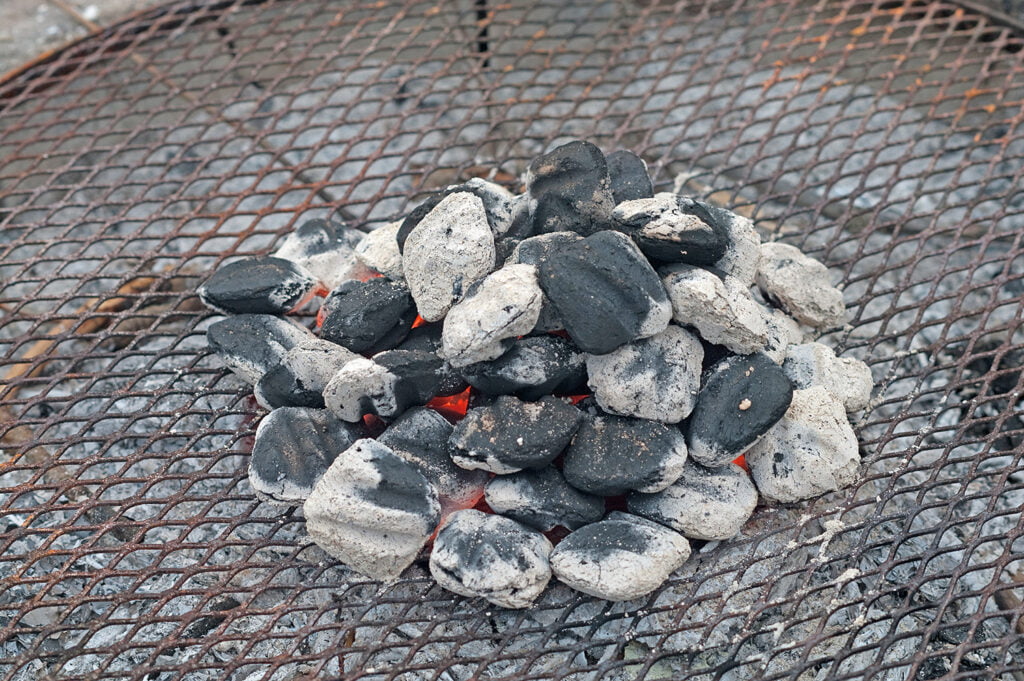
Photo credit: Tim Fowler
2. Line the Dutch oven bottom and about half an inch up the side with a circle of parchment paper.
3. Butter the inside of the oven and the surface of the parchment paper well or spray with Pam.
4. Fill the tin can with clean rocks and set it in the middle of the Dutch oven.
5. Butter the outside of the tin can.
6. When the briquets are covered in white ash, place 17 briquets evenly within the rim of the Dutch oven lid, and place nine briquets under the oven. This will give you an oven temperature of about 350 F.
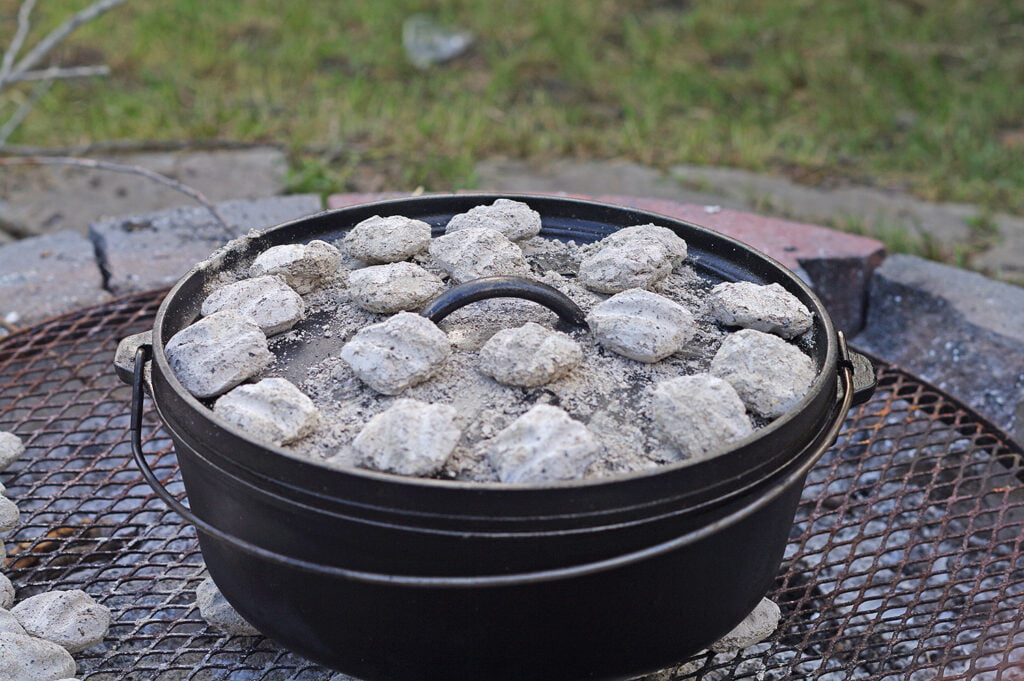
Photo credit: Tim Fowler
7. While the oven is preheating, add the ingredients to a large six-litre bowl, hot water last, and beat until smooth—about two minutes.
8. Pour the batter around the tin can, into the oven.
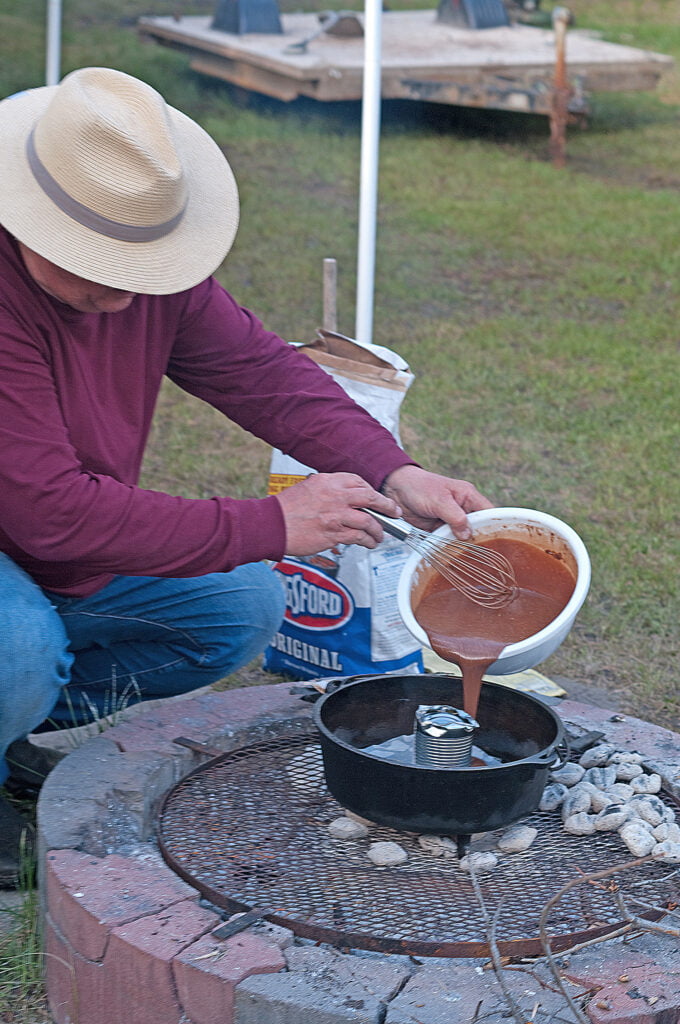
Photo credit: Time Fowler
9. Return the lid to the oven.
10. And bake 30 minutes. No peeking!
11. At 30 minutes remove the lid and test for doneness with a toothpick. The cake is done when toothpick poked into the cake comes out clean.
12. Remove the oven from the briquets; remove the tin can carefully.
13. Place a dinner plate upside down over the cake and invert onto the plate.
14. Frost the cake with your favourite icing, or just sprinkle it with icing sugar.
15. Serve with whipped cream, ice cream, or anything else your fellow campers enjoy.
Note: You might be tempted to add more briquets, but don’t! The cake will burn. If the bottom of the cake does get toasty, just trim off the char and pretend everything is fine because it is. Life is short: enjoy cake.
Related Articles
Canadian RV Innovators: Sweat, Tears, and the Rise of Van Life
Freedom Reimagined Freedom on the open road has always been a Canadian dream: through the Rockies, along Maritime coastlines, and deep into northern wilderness. In the past decade, that dream has taken a new shape: van life. Once a fringe idea, it has become a...

Saint John, New Brunswick: A City Reinventing Itself
Saint John, New Brunswick's young entrepreneurs are reinventing the city as a tourist destination, a place to live, and a place to camp. First View of the City Be daring; you can take a detour on approaching the city from the southwest. Use your GPS and cross the...

Make Your Travel-Inspired Oasis Right at Home
Stuck at home when where you really want to be is miles away exploring new sights, sounds, and experiences in your beloved RV? We get it. You were meant to be an explorer. You are someone who likes to be the driver’s seat in your life, charting new courses...

